

With the arrival of summer, the golden preparation period, many students are gearing up to conquer the GRE in the coming months!
However, for those just starting their GRE prep, the registration process might be unfamiliar. Today, we provide a detailed introduction to the registration process for the GRE offline in China to help you breeze through it!

Step 1: Register an ETS Account
1. First, open the official GRE registration website for China: https://gre.neea.cn/login.do. Once the page loads, click the "Online Registration" button in the upper right corner of Figure 1.

Figure 1: GRE Homepage
Then click the "Register New User" button below Figure 2 to begin filling in your information and creating an account.
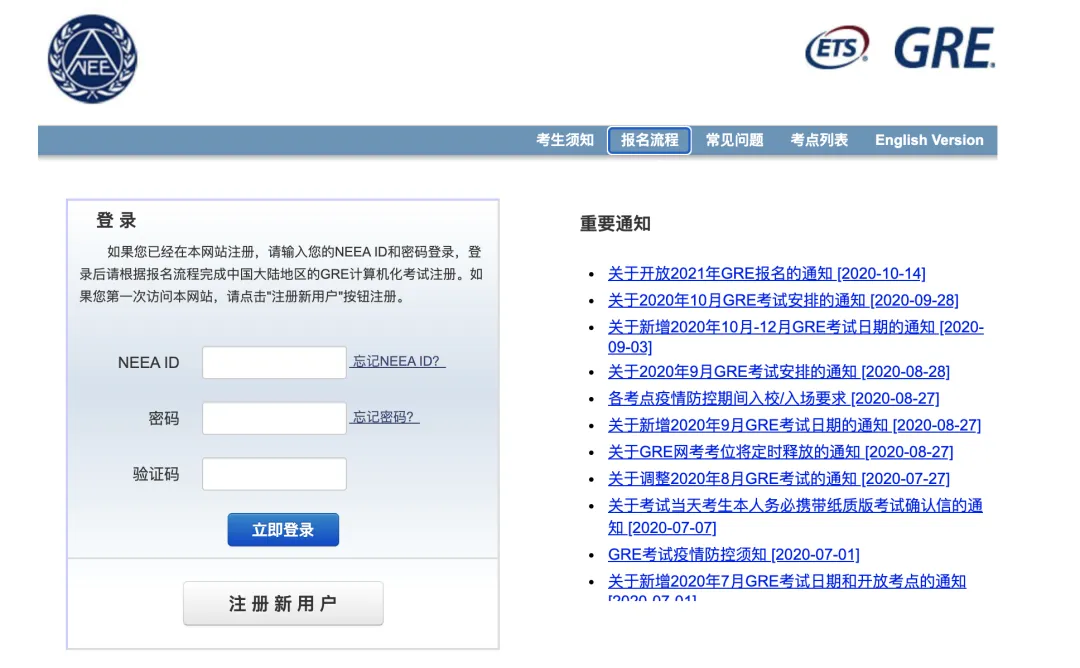
Figure 2: Create an Account
2. Agree to the registration agreement.
.bmp)
Figure 3: Accept Registration Agreement
2. You will need to fill in two types of information: first, personal information, as detailed below:
1) Fill in Basic Personal Information
-
The name (Chinese and English), gender, ID type, ID number, and date of birth you provide must match exactly the information on your identification document (e.g., passport).
-
When entering your email address, use the one you check most frequently to avoid missing important notifications.
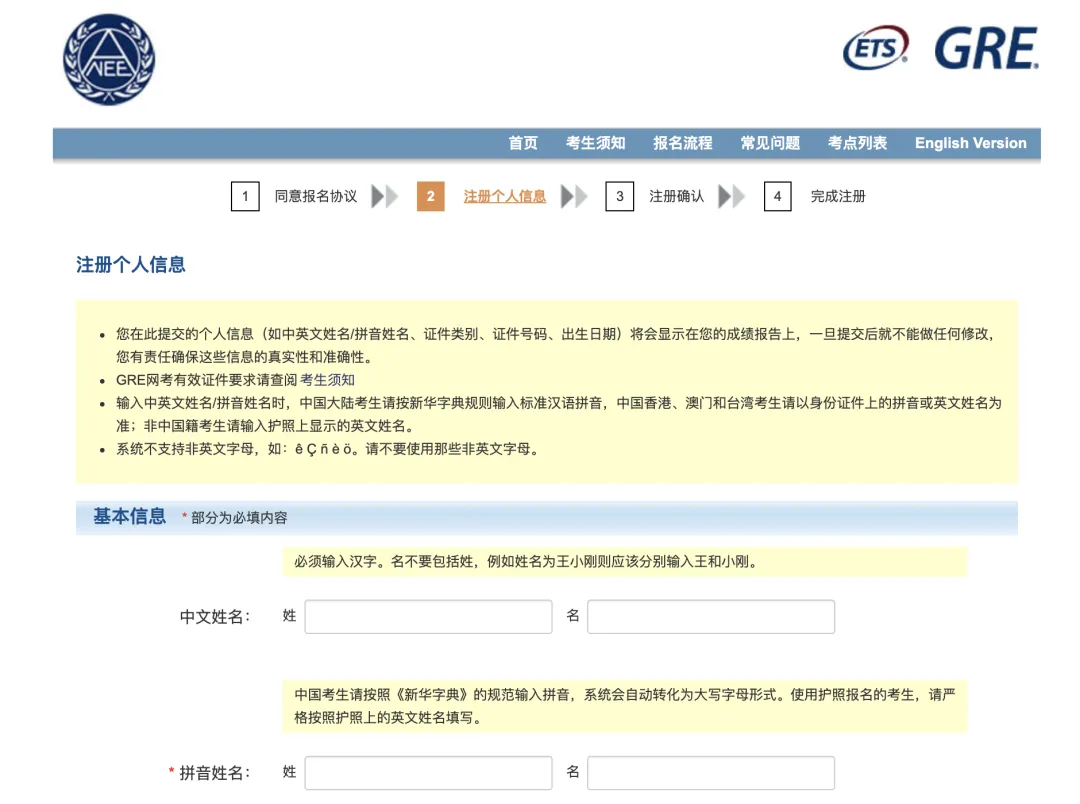
Figure 4: Basic Personal Information
2) Fill in Address and Phone Number
-
Provide your English and Chinese addresses in detail. Pay special attention to the address, as this is where your score report will be sent.
.bmp)
Figure 5: Address and Phone Information
4. After carefully confirming your registration information, proceed to the completion page. Click login to access your personal test registration homepage.
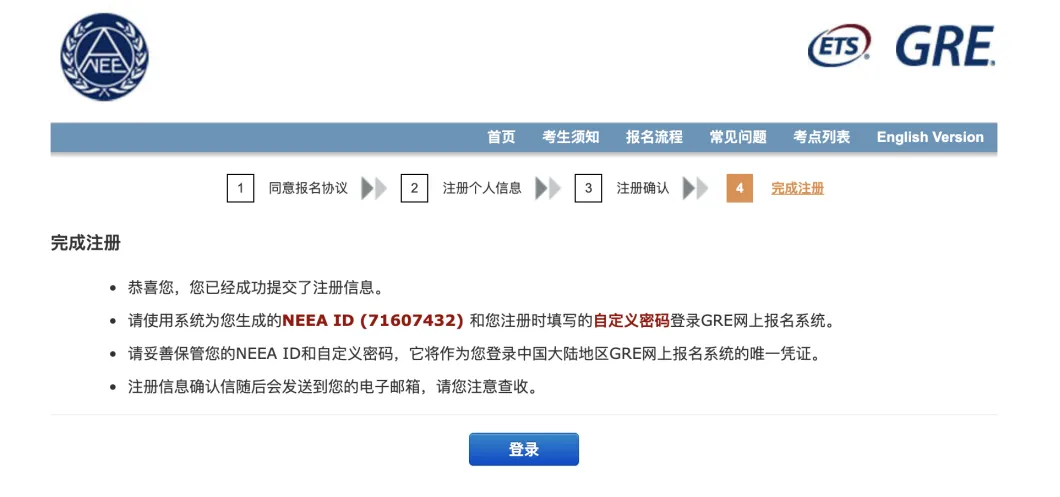
Figure 6: Registration Complete
Note! Right after registration, the system may not immediately display your "ETS Registration Number" – it usually takes 5 minutes to 2 hours for it to appear.
Step 2: Register for the Test and Make Payment
1. Log in to your account to register. Use your NEEA ID and self-set password to log in, and you will see your personal information. After recharging your account, you can begin registration.
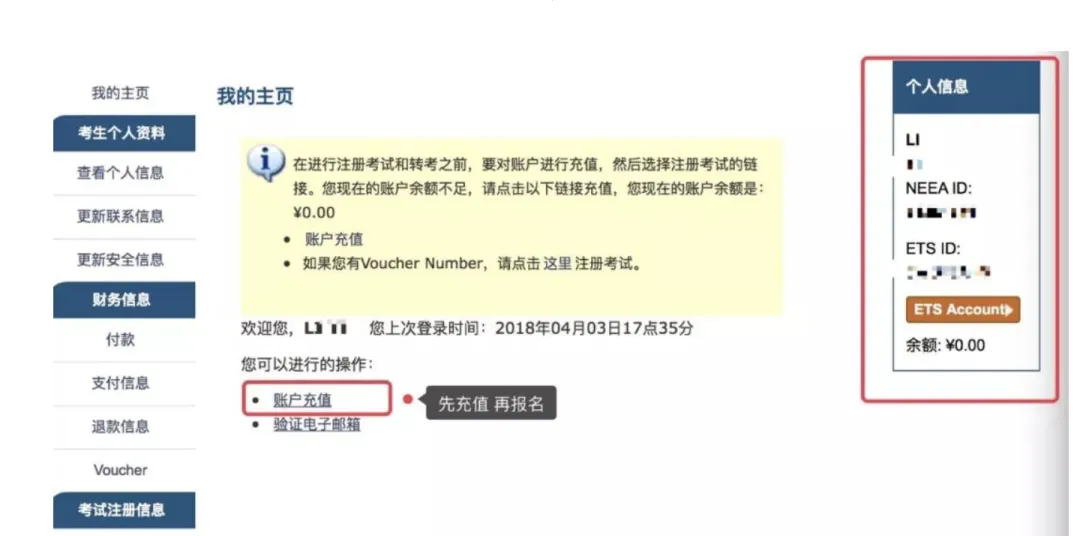
Figure 7: Account and Password Setting
2. Select your test center and test date. Click "Register for Test" on the left side of the homepage, and choose your preferred test city and date.
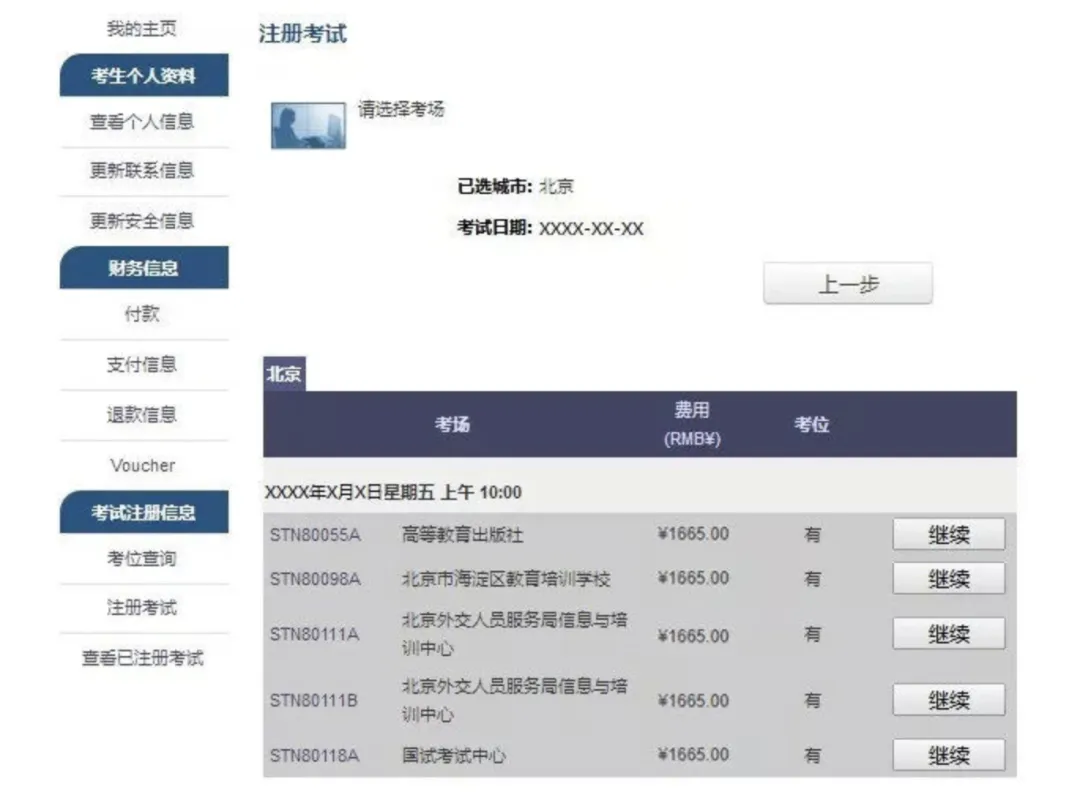
Figure 8: Register for Test / Seat Selection
3. After registering for the test and completing the background survey, you will see a page confirming successful registration. You can then click "View Registered Tests" on the left side of your homepage to check your registration status.
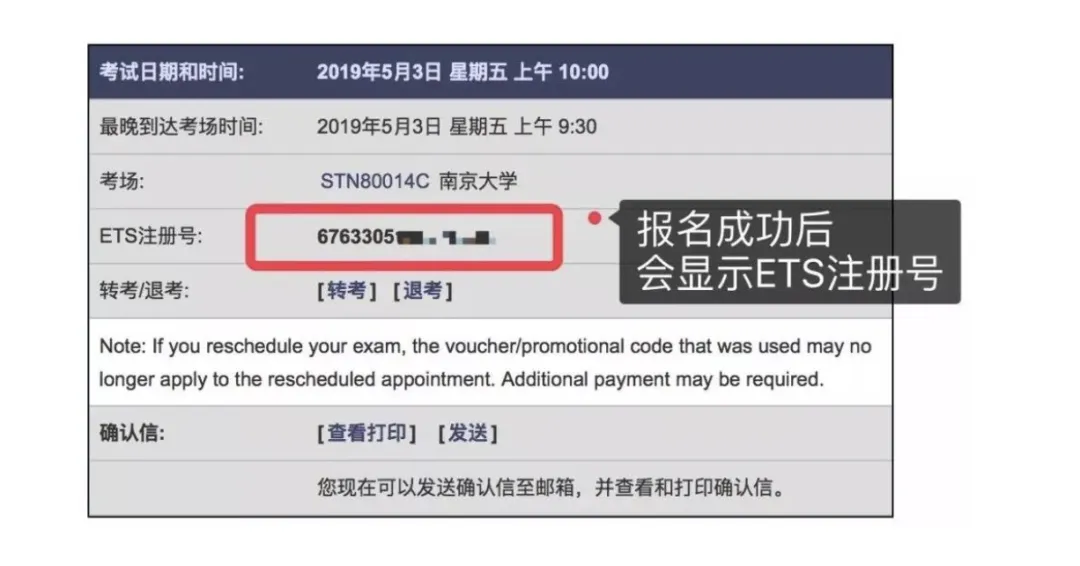
Figure 9: Successful Registration Page

GRE Seat Availability Query Process
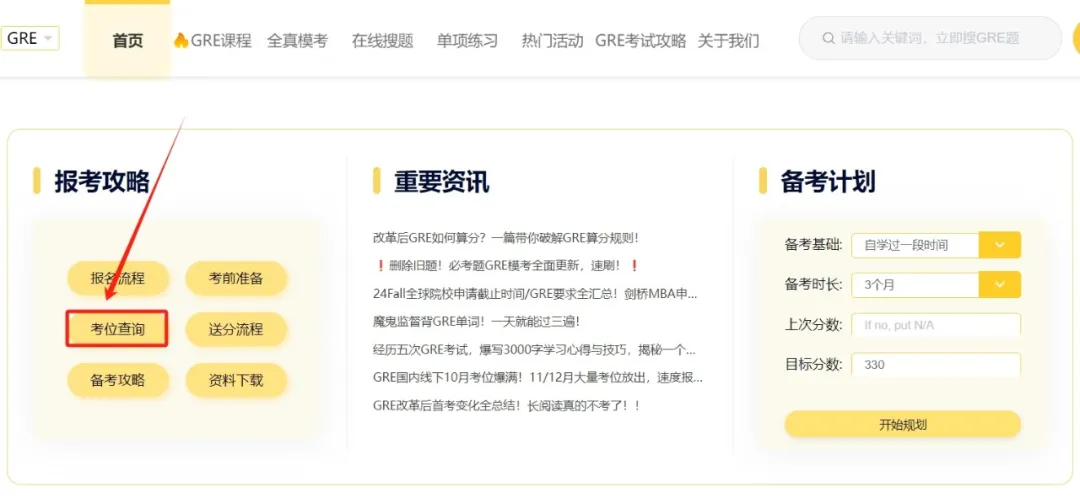
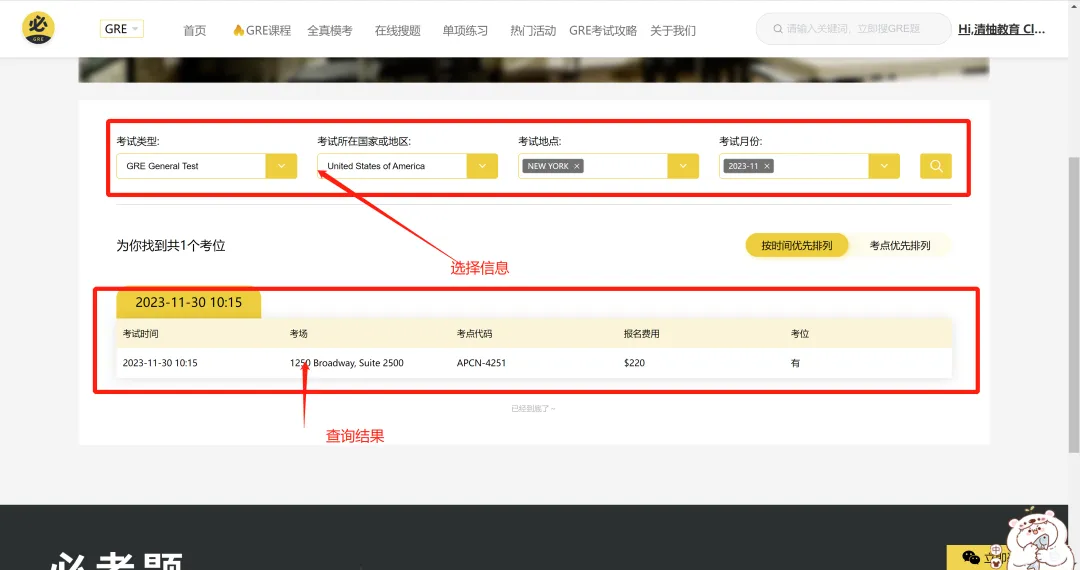
The Bikaoci official website now offers a real-time GRE seat availability query feature – just three simple steps to find GRE seats! Currently supports offline test center and at-home test seat queries for China, the United States, Canada, and the United Kingdom!

1. First, go to the Bikaoci official website [bikaoci.com] and click "Seat Query."
2. Register and log in to your account.
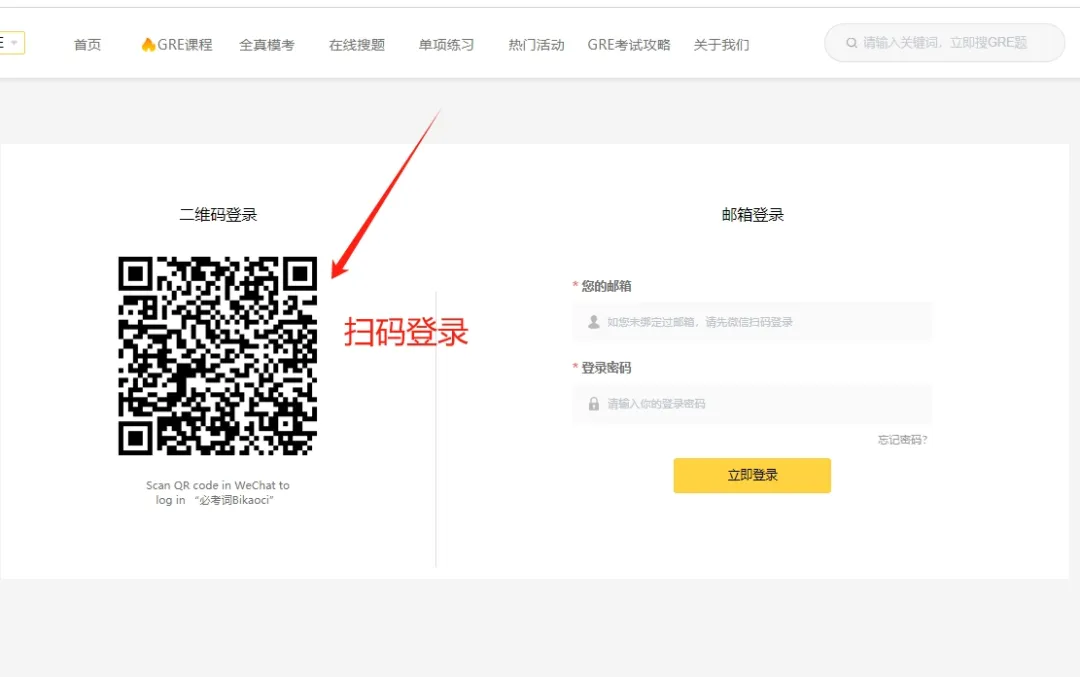
3. Select the test type, test country, specific location, and date to query available seats.
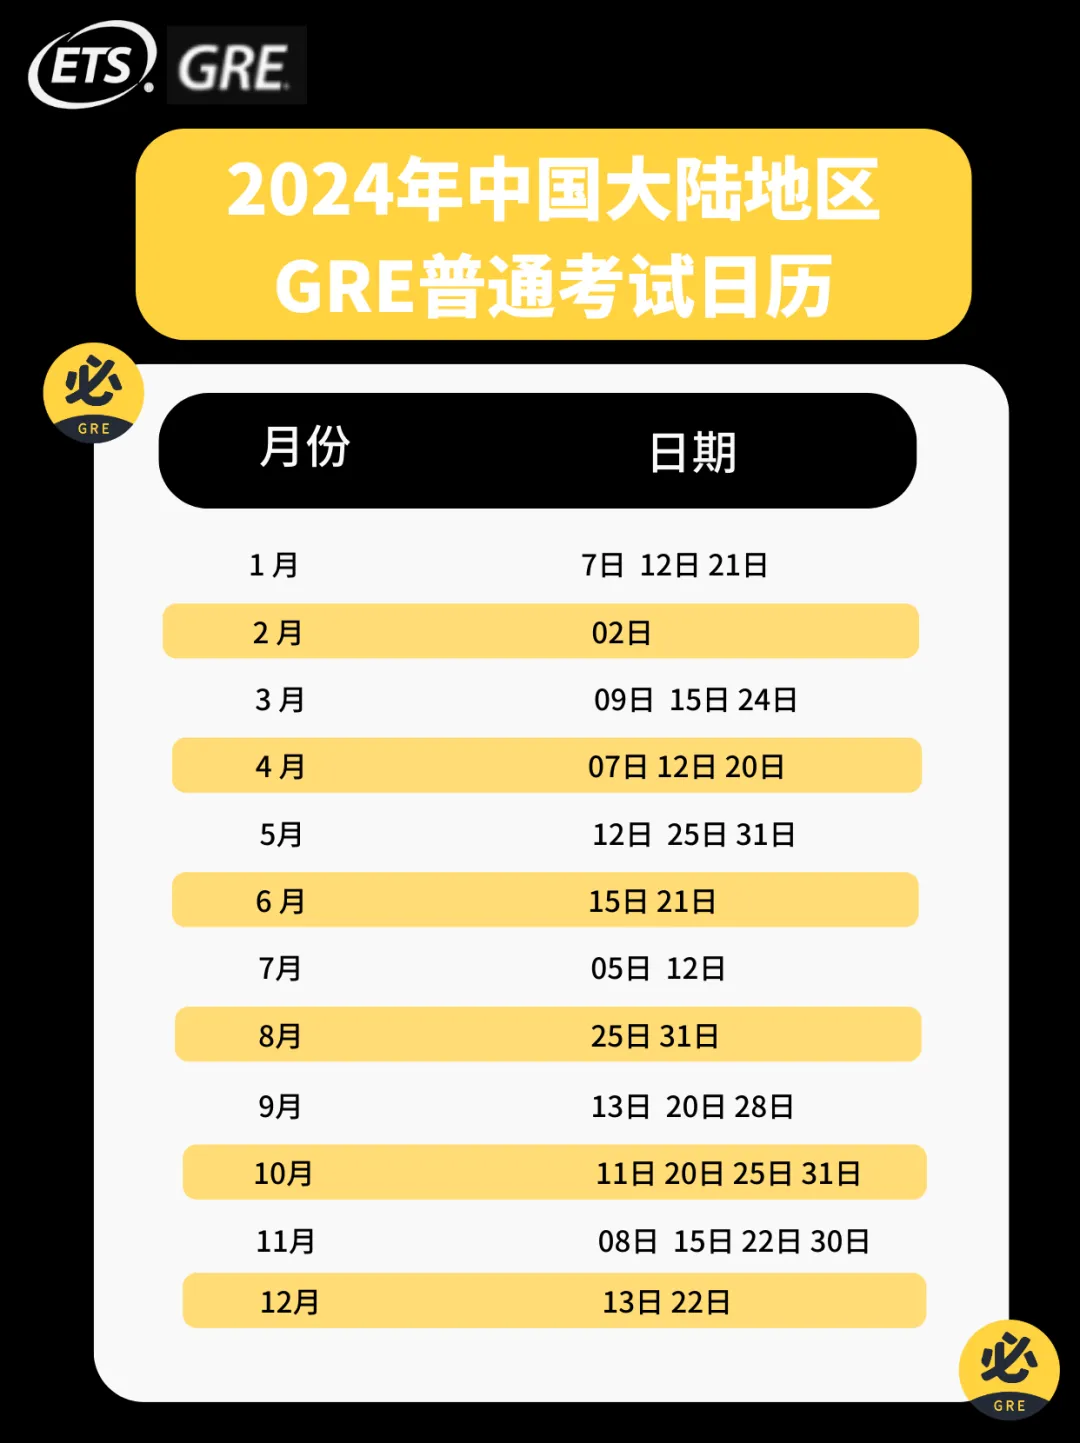
🔥2024 GRE Test Dates Calendar🔥
Finally, here is the 2024 GRE test dates calendar for mainland China. Since seats are limited, plan ahead and secure your spot early!
If seats are temporarily full, don't worry too much. The NEEA website releases vacated seats from transfers and cancellations every Wednesday and Friday at 10:00 AM.
▪️ To register at a test center in mainland China, please visit:
▪️ To register at a test center outside mainland China, please visit:
There is also a detailed guide for registering for the at-home test; feel free to check it out~
GRE Summer Subject-specific Classes Are Open for Registration 🔥
Add our advisor for a personalized GRE study plan